Rustic Cowboy Cookies: A Hearty Delight for Any Occasion
Bake Cowboy Cookies for a Hearty Treat! These easy, chewy cookies packed with oats and chocolate chips are perfect for your next gathering.

- Stirring Nostalgia: The Allure of Cowboy Cookies
- The Sweet Journey of Cowboy Cookies
- Why You’ll Love This Recipe
- Health Benefits You Didn’t Expect
- Essential Ingredients Guide for Baking
- Mastering Professional Cooking Methods for Amazing Cookies
- Pro Tips & Secrets to Bake Cowboy Cookies for a Hearty Treat
- Perfect Presentation
- Storage & Make-Ahead
- Creative Variations
- Complete Nutrition Guide
- Conclusion: Happy Baking!
- Frequently Asked Questions
- Recipe Card
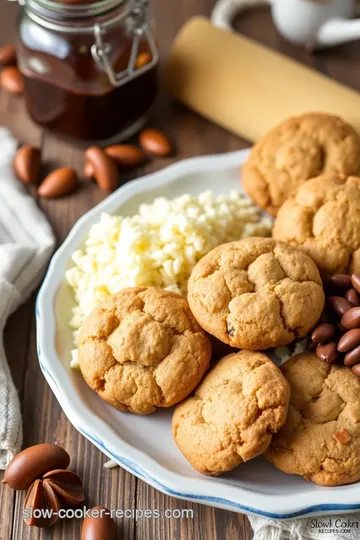
Stirring Nostalgia: The Allure of Cowboy Cookies
Have you ever found yourself reminiscing over a simple, yet deeply satisfying cookie from your childhood? you know the one i'm talking about—the one packed with chocolate chips, nuts, and a sprinkle of good ol' oats? that’s right! i’m talking about baking cowboy cookies for a hearty treat .
Picture this: sitting around the campfire, maybe with friends or family, nibbling on a cookie that just seems to embody the spirit of the american west.
Honestly, nothing beats that feeling!
These rustic cookies, with their chewy textures and flavor bomb combinations, are so much more than just desserts. they’re memories wrapped in a warm cookie shell.
Growing up, my grandma used to whip these up every summer. i can still hear the sound of her mixer and the aroma wafting through the house.
Cowboy cookies are kind of like a trail mix you can eat in cookie form. what’s not to love?
The Sweet Journey of Cowboy Cookies
So, let’s dive a bit into the brass tacks. cowboy cookies are said to have originated in the american west, designed as a hearty treat for cowhands on long trail rides.
They’ve become a staple of many family recipes and have certainly made their rounds at potlucks and bake sales. nowadays, they’re super popular and perfect for any occasion—from family gatherings to just a cozy night in.
You can whip up these gems in about an hour, depending on how fast you can scoop and bake. and let's be real; if you’re like me, the hardest part is waiting for the dough to chill for 30 minutes! it’s medium-difficulty at best.
But the reward? oh boy, you’ll yield around 24 cookies that are just begging to be devoured.
Why You’ll Love This Recipe
Let’s talk about the perks! what sets these rustic cookie recipes apart? first off, they’re packed with nutritional goodies. the oats bring in some fiber, and depending on your add-ins—think nuts or even dried fruits—you get a bonus protein punch! plus, they are a baking wonder—these don’t just look great; they taste phenomenal alongside your morning coffee or as a sweet afternoon snack.
Talk about a perfect pairing!
You can also whip these up to celebrate special occasions. whether you're hosting a birthday bash or just having a few friends over, these cookies never disappoint.
They’ve got a uniqueness that most homemade cookie treats lack. plus, i promise they'll get everyone talking (and eating!).
Health Benefits You Didn’t Expect
These cookies are far more than a sweet treat. the oats in the mix give you a good dose of health benefits.
They’re linked to lots of great stuff, like heart health and stable energy levels. plus, if you're feeling adventurous, you can throw in some less common cookie flavors like dried fruits or coconut to really jazz things up!
And if you’re wondering about variations, you can easily twist this recipe into something gluten-free or dairy-free without sacrificing flavor. There’s a world of cookie flavor combinations to experiment with.
So, ready to get rolling on these delicious cookies? Next up, let’s grab our favorite ingredients and get this baking fest underway!
Essential Ingredients Guide for Baking
Let’s dive into some of the premium core components you’ll want in your kitchen if you’re looking to whip up delicious treats.
For starters, it’s all about understanding your ingredients. honestly, having the right stuff can take your baking from, "meh," to "oh my gosh, this is heavenly!"
Premium Core Components
First off, let’s talk detailed measurements . in the us, we often stick to cups and tablespoons, while the metric crowd prefers grams and liters.
Having both measurements on hand is super useful when you want to try out a cowboy cookies recipe from british blogs.
Now, onto quality indicators . For butter, look for a nice pale yellow color and the freshest scent. When it comes to flour, remember: the fresher, the better. Always check expiration dates!
Storage Guidelines and Shelf Life
Make sure to store your ingredients right! keep flour in a cool, dry place in an airtight container—this keeps bugs out and prevents it from turning rancid.
Generally, your average flour lasts about 6-12 months in good conditions.
For eggs, check for freshness by placing them in water. If they sink, they’re still good; if they float, toss 'em out.
Freshness Tips and Selection Criteria
When you pick up fresh produce like bananas or berries to add into your oatmeal chocolate chip cookies , look for vibrant colors and firm textures.
You want ingredients that are ready to shine in your homemade cookie treats ! be picky; you’re going for flavors, after all.
Signature Seasoning Blend
Now, this is where the magic happens. spice combinations can elevate your cookies from good to drool-worthy. a pinch of cinnamon or nutmeg can really boost your flavor game, especially in rustic cookie recipes .
Herbs are a bit less common in baking, but you can get creative with rosemary or lavender in certain treats.
And don’t forget about flavor enhancers like good vanilla extract—skimping here is a no-go. always reach for pure extract.
Smart Substitutions
What if you run out of an ingredient? don’t sweat it! for example, if you’re out of baking soda but have baking powder, you can usually swap it in with some adjustments.
This is key when you're in a pinch trying to bake those chewy cookie recipes .
And for those with dietary restrictions, consider using dairy-free baking substitutes like almond milk instead of cow’s milk or a gluten-free flour blend.
It’s super easy to modify for your family and friends; there are plenty of family-friendly cookie recipes tailored for everyone.
Kitchen Equipment Essentials
Let’s chat about what you need in your kitchen. it doesn't take much, really. a sturdy mixer is great, but you can get by with a good old whisk if that’s what you’ve got.
Other must-have tools include mixing bowls, baking sheets, and parchment paper.
An unexpected tip? use a cookie scoop for evenly dropped cookies, which will help you get that golden edge we’re all searching for.
And for storage? keep cookies in a sealed container at room temperature to maintain that chewy texture that makes your mouth water.
Now that we’ve got the basics covered, let’s get to baking! the next step is to bake cowboy cookies for a hearty treat that will make your kitchen smell divine.
You’ve got the knowledge; now it's time to put it to a delicious test! stay tuned for those step-by-step instructions that will turn you into the baking champion of your home!
Mastering Professional Cooking Methods for Amazing Cookies
Let’s dive into the world of professional cooking methods, especially focusing on baking those delightful Cowboy Cookies —you know, the ones that are perfect for a hearty treat! After all, if it’s got the hearty spirit of the American West, it’s gotta be good, right?
Essential Preparation Steps
Before you even pull out that mixing bowl, let’s talk about something super important: mise en place , or “everything in its place.
” this means gathering all your ingredients first. have your 1 cup (226g) unsalted butter , 1 cup (200g) brown sugar , and all those fun add-ins like chocolate chips and nuts ready to go.
It makes the whole process smoother and way less chaotic!
Time management is crucial too. set a timer when you're chilling that cookie dough for 30 minutes . use this time to clean up or prep your baking sheets.
Speaking of sheets, let’s not forget organization ! line your baking sheets with parchment paper beforehand. it's a game changer.
No sticking, no mess.
And remember, with any kitchen endeavor, safety comes first! always keep your workspace tidy, use oven mitts to avoid burns, and be mindful of where you place your utensils.
Trust me; it's easy to have a “whoops” moment if you're not careful.
Step-by-Step Process
Now, let’s get our hands messy with this step-by-step process for baking these cookies.
-
Preheat your oven to 350° F ( 175° C) . Get that heat going while you prep!
-
Cream the butter : in your mixing bowl, blend the softened butter , brown sugar , and granulated sugar . aim for that fluffy, light texture—about 2 minutes should do the trick.
-
Eggs and vanilla go in next. Beat those in one by one, and make sure it’s all mixed up nicely.
-
In a separate bowl, whisk together your dry ingredients: 2 cups (240g) all-purpose flour , 1 teaspoon baking soda , and 1/2 teaspoon salt .
Pro tip: it’s best to do this step to ensure no clumps.
-
Now, mix your dry into the wet until just combined—don’t overdo it! We want those cookies chewy and delicious !
-
Fold in those add-ins : Chocolate chips, maybe some nuts if you're feeling adventurous. I mean, who doesn’t love a surprise crunch in their cookie?
-
Chill the dough for 30 minutes . This step is key! It makes it easier to handle and prevents those cookies from spreading too much.
-
Scoop and bake! drop the dough onto your baking sheets, making sure each cookie is spaced about 2 inches apart.
Bake them for 12- 15 minutes until the edges are golden brown.
-
Cool : Let those beauties rest on the baking sheet for about 5 minutes before moving them to a cooling rack. This helps them set up perfectly.
Expert Techniques
Alright, let’s get into some expert techniques that could make these cookies top-notch.
Critical steps include making sure your dough is not too wet. if it’s sticky, add a bit more flour. and when checking for doneness, look for that golden edge, but the center should remain soft.
You want that perfect chewy cookie texture !
If something goes awry, like your cookies spread too much, check if you forgot to chill the dough or maybe measured the flour incorrectly. It happens to the best of us!
Success Strategies
Here’s the scoop on avoiding common mistakes:
- Overmixing is not your friend. Mix until just combined for those perfect, chunky, rustic cookies .
- Double-check measurements—especially for flour and sugar. Too much can lead to a dry cookie.
- Got dough left over? No problem! You can stick it in the fridge for later. Just be sure to wrap it tightly.
Ready, Set, Bake!
So there you have it! you’ve learned some cool professional cooking methods to bake the best cowboy cookies for a hearty treat .
Honestly, these tips apply to easy cookie recipes or even homemade cookie treats . whether you’re whipping up some oatmeal chocolate chip cookies or trying out unique cookie add-ins, these lessons will help you shine in the kitchen.
Stay tuned for more tips in the next section: Additional Information! Happy baking, friends!
Pro Tips & Secrets to Bake Cowboy Cookies for a Hearty Treat
Get ready to become the hero of the kitchen! when you bake cowboy cookies for a hearty treat , you’re not just making cookies; you’re bringing joy into every bite.
Here are a few insider secrets to take your cookie game from “meh” to “omg!”
First off, don’t be shy with the chilling! chilling that dough for at least 30 minutes helps prevent your cookies from spreading too much.
Trust me on this one. i once skipped the chilling step, and let’s just say my cookies turned into a giant cookie pancake.
Not cute! also, mix that dough just until combined, okay? overmixing can lead to tough cookies, and we want them chewy and delightful, not like a hockey puck.
Another tip? flavor enhancements! a teaspoon of cinnamon adds a warm, cozy touch. or, try a pinch of sea salt on top before baking for that sweet-and-salty magic.
It’s like a flavor explosion in your mouth!
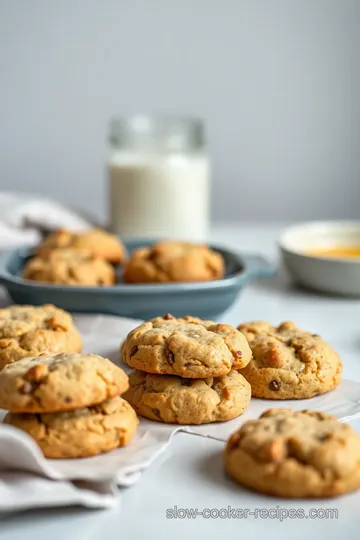
Perfect Presentation
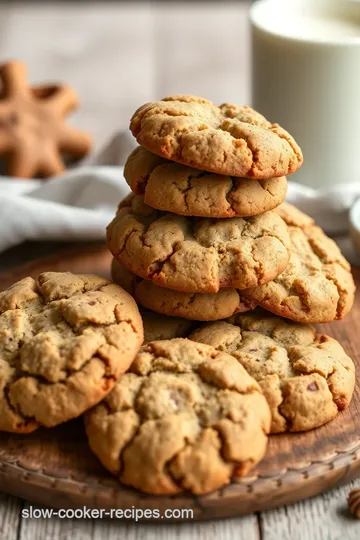
Now, let’s talk about presentation. if you want your cookies to wow your friends, a little plating goes a long way.
Stack a few cowboy cookies high on a rustic wooden board and sprinkle some oats and nuts around for a cute touch.
You could also pop a fresh mint leaf on top of each cookie to give it that fancy restaurant vibe .
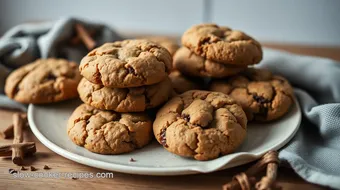
For color combinations, consider mixing in chocolate chunks with colorful m&m's or dried cranberries. they’ll add that pop! just think: you want these treats to be as easy on the eyes as they are on the taste buds.
Storage & Make-Ahead
One of the great things about these cowboy cookies is how easy they are to make ahead. you can whip up the dough and stick it in the fridge for about 3 days .
Just don’t forget to separate the dough into balls and flash freeze those. once they’re solid, transfer them to airtight bags.
When you’re ready, just toss them directly into the oven from the freezer. yes, you heard that right!
Once baked, store your cookies in an airtight container at room temperature. they’ll keep for about a week —if they last that long in your house! these cookies freeze well, too.
Just make sure they’re fully cooled before you wrap them.
Creative Variations
Feeling adventurous? let’s jazz things up with some creative variations . swap out chocolate chips for butterscotch or peanut butter chips for a twist.
Or change it up seasonally—how about adding dried cherries and almonds in the fall? you could even toss in a bit of pumpkin spice for that autumnal flair.
If you or a loved one needs a gluten-free fix, simply switch the flour to a gluten-free blend, and boom! now they can enjoy hearty snacks without worry.
It’s all about adapting, right?
Complete Nutrition Guide
Now, let’s chat about the numbers—no one loves counting calories, but it’s good to know what’s in those delicious treats! each cookie offers about 150 calories , packed with a dose of fiber from the oats and a hit of protein from the nuts (if you add them).
Just keep an eye on your portion sizes to keep it balanced.
Considering dietary needs? these cookies can be tailored! swap butter for coconut oil to embrace a dairy-free baking substitute . or, use flaxseed meal and water as an egg replacement for a vegan option.
Always nice to know we can provide a sweet treat that fits everyone's tastes!
Conclusion: Happy Baking!
So, what are you waiting for? bake cowboy cookies for a hearty treat that everyone—friends, family, or just you and that netflix show—will adore.
Remember, cooking is about fun, flavor, and personal flair. each batch is a chance to experiment , find your favorite cookie flavors, and maybe even share a slice of joy.
Grab that mixing bowl, unleash your inner cowboy, and get baking! your taste buds will thank you. happy baking, friends!
Frequently Asked Questions
What makes Cowboy Cookies different from regular cookies?
Cowboy cookies are hearty and robust, packed with ingredients like oats, chocolate chips, and nuts, giving them a chewy texture and a rich flavor. The combination of add-ins makes them a more filling snack compared to standard cookies, making them perfect for those needing a bit of sustenance on the go.
How do I Bake Cowboy Cookies for a Hearty Treat without them spreading too much?
To prevent your cowboy cookies from spreading excessively during baking, be sure to chill the dough for at least 30 minutes before scooping them onto the baking sheet. Additionally, avoid overmixing the dough; mix until just combined for the best texture.
Can I use different types of chocolate in my Cowboy Cookies?
Absolutely! Feel free to experiment with various types of chocolate such as dark, white, or milk chocolate chips. You can even mix different kinds or add flavored chips like butterscotch or mint for a unique twist on your Cowboy Cookies.
What is the best way to store leftover Cowboy Cookies?
To keep your Cowboy Cookies fresh, store them in an airtight container at room temperature for up to a week. For longer storage, consider freezing them in a zip-top bag with layers of parchment paper in between to prevent sticking. They can be enjoyed straight from the freezer or thawed at room temperature!
Can I make Cowboy Cookies gluten-free?
Yes, you can easily make Cowboy Cookies gluten-free by substituting the all-purpose flour with a gluten-free flour blend. Be sure to check that all your other ingredients, like oats and chocolate chips, are certified gluten-free to ensure the final product is safe for those with gluten sensitivities.
What are some healthy variations I can make for Cowboy Cookies?
For healthier variations, consider using whole grain flour instead of all-purpose flour, reducing the sugar slightly, or adding in flaxseeds or chia seeds for added fiber. You can also substitute butter with applesauce or a blend of butter and nut butter to reduce calories while enhancing flavor.
Rustic Cowboy Cookies: A Hearty Delight for Any Occasion Card
⚖️ Ingredients:
- 1 cup (226g) unsalted butter, softened
- 1 cup (200g) brown sugar, packed
- 1/2 cup (100g) granulated sugar
- 2 large eggs
- 2 teaspoons vanilla extract
- 2 cups (240g) all-purpose flour
- 1 cup (90g) rolled oats
- 1 teaspoon baking soda
- 1/2 teaspoon salt
- 1 cup (180g) semisweet chocolate chips
- 1/2 cup (75g) chopped walnuts or pecans (optional)
- 1/2 cup (90g) shredded coconut (optional)
🥄 Instructions:
- Step 1: Preheat your oven to 350°F (175°C) and line baking sheets with parchment paper.
- Step 2: In a mixing bowl, cream together the softened butter, brown sugar, and granulated sugar until light and fluffy.
- Step 3: Beat in the eggs one at a time, followed by the vanilla extract until well combined.
- Step 4: In a separate bowl, whisk together the flour, oats, baking soda, and salt.
- Step 5: Gradually mix the dry ingredients into the butter mixture until just combined.
- Step 6: Gently fold in chocolate chips and any optional add-ins like nuts or coconut.
- Step 7: Cover the dough and chill in the refrigerator for at least 30 minutes for easier handling.
- Step 8: Using a cookie scoop or tablespoon, drop dough onto prepared baking sheets, spacing them about 2 inches apart. Bake for 12-15 minutes, or until golden brown around the edges.
- Step 9: Let cookies cool on baking sheets for 5 minutes before transferring them to a cooling rack.
Previous Recipe: My Family's Favorite Slow Cooked Beef Stew with Unique Flavors
Next Recipe: My Easy Air Fryer Garlic Bread with Cheesy Goodness: A Family Favorite!