Air Fryer Garlic Bread with Cheesy Goodness
Indulge in the best Air Fryer Garlic Bread with Cheesy Goodness! This quick and flavorful treat is perfect for dinner or as a tasty snack. Grab the recipe!

- The Magic of Air Fryer Garlic Bread with Cheesy Goodness
- Essential Ingredients Guide: Make the Best Air Fryer Garlic Bread with Cheesy Goodness
- Mastering Professional Cooking Method: Your Guide to Deliciousness
- Pro Tips & Secrets for Your Garlic Bread Adventure
- Frequently Asked Questions
- Recipe Card
The Magic of Air Fryer Garlic Bread with Cheesy Goodness
Oh my gosh, have you ever had that moment where you just come home, throw your bag on the couch, and think, “i need garlic bread —like, now ”? i get it! when those cheesy cravings kick in, nothing hits the spot quite like an indulgent slice of air fryer garlic bread with cheesy goodness .
It’s crispy, buttery, and cheesy all at once. what more could you ask for?
So, let’s talk about how this recipe evolved. garlic bread, in general, has been around for ages, right? it’s a staple in italian cuisine.
Traditionally, it’s humble bread smeared with butter and garlic. but, fast-forward to today, and we’ve got it all fancy in our air fryers! this cooking gadget has become a total game-changer, making our favorite snacks like cheesy garlic bread quicker than ever.
We’re talking about a total prep time of just 20 minutes !
Recipe Overview
This isn’t just any old garlic bread; it’s not complicated, either. you won’t need a culinary degree to whip this up.
Just grab some simple ingredients and an air fryer . the beauty of air fryer recipes is that they cook quickly, meaning you’ll be enjoying crispy garlic bread in no time.
Plus, it’s affordable, making it a guilt-free indulgence.
Now, if you’re thinking about hosting a dinner, serving this as a side dish for pasta is pure genius. you’ll impress your friends and keep everyone coming back for more.
And guess what? it serves four people , so you could share…if you’re feeling generous!
Key Benefits
Now, let’s get down to the nitty-gritty of why this recipe rocks. first off, it’s loaded with health benefits thanks to cooked garlic .
Garlic is not just tasty; it’s good for your heart! plus, using butter and garlic means flavor central in your mouth.
You can even sprinkle in some parmesan cheese for a little extra kick and a touch of, dare i say, indulgence.
This recipe is perfect for special occasions, game night, or just as a spontaneous treat after a long day. it also holds its own as an easy appetizer recipe at parties.
You can kick it up a notch by pairing it with homemade marinara for dipping. seriously, your friends will be raving!
And let me be clear: if you’ve got a picky eater in the house, this butter and garlic bread is universal.
You won’t find anyone saying no to crispy garlic bread topped with gooey mozzarella !
Adapting for Everyone
If you’re thinking about dietary restrictions, we’ve got options here. this recipe can be adjusted for vegan garlic bread by swapping butters and cheeses, or you can go for a gluten-free version by using gluten-free bread.
The versatility of this dish is chef's kiss .
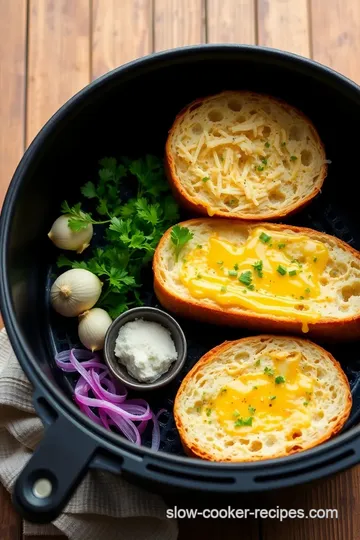
So, if you’re ready to bring some cheesy, crispy joy into your kitchen, let’s dive into the ingredients you'll need!
For the Garlic Butter:
- 1/2 cup unsalted butter, softened
- 4 cloves garlic, minced
- 1 tsp Italian seasoning
- A pinch of salt and pepper
For the Bread:
- 1 medium loaf of French or Italian bread
- 1 cup shredded mozzarella cheese
- 1/2 cup grated Parmesan cheese
- Fresh parsley for that photogenic garnish!
Join me as we make your kitchen smell cozy and oh-so-delicious. You’re not just cooking; you’re creating a moment of joy! Get ready to impress with Air Fryer Garlic Bread with Cheesy Goodness !
Essential Ingredients Guide: Make the Best Air Fryer Garlic Bread with Cheesy Goodness
So, you want to whip up the ultimate air fryer garlic bread with cheesy goodness ? let's dive into some essential ingredients that'll give your garlic bread the wow factor! seriously, nothing beats that buttery, cheesy, and garlicky goodness right out of the air fryer.
It’s the perfect side dish for pasta or a quick snack on movie night!
Premium Core Components
First things first, let’s talk about the core ingredients. Here’s a breakdown of what you need:
- 1/2 cup (115g) unsalted butter : This is your base. Make sure it’s softened for easy spreading.
- 4 cloves of garlic (minced) : Fresh is best! You’ll get that delicious aroma and taste that pre minced stuff just can’t match.
- 1 teaspoon Italian seasoning : A must-have for bringing that Italian vibe!
- 1/4 teaspoon salt and 1/4 teaspoon black pepper : You can always adjust these to suit your taste.
Now, for storage, keep unsalted butter tightly wrapped in the fridge. it has a shelf life of a couple of months.
Fresh garlic? store it in a cool, dry place. when selecting garlic, go for firm bulbs without any sprouting. trust me, fresh is key for that flavorful garlic bread !
Signature Seasoning Blend
Let’s not forget about the signature seasoning blend . You can get creative here! Don’t just stop with those basic spices:
- Herbs : Fresh parsley is awesome for garnishing, but you can throw in some oregano or even basil into that garlic butter.
- Flavor enhancers : A pinch of red pepper flakes can spice things up if you’re feeling adventurous.
- Regional variations : Going for an Italian flair? Swap the Italian seasoning for Herbes de Provence or add some sun-dried tomatoes for extra pizzazz!
Smart Substitutions
We all want to keep things flexible. Here are some smart substitutions if you’re in a pinch:
- Butter : If you're dairy-free, you can use vegan butter. It’ll still be creamy and delish.
- Cheeses : Mozzarella isn’t the only player here! Feel free to mix and match with provolone or gouda. Parmesan is fab, too!
- Gluten-free bread : No worries here; just grab a gluten-free loaf, and you’re good to go!
And hey, if you ever find yourself out of garlic, fresh or powdered, you can even use pesto or an herb-infused oil!
Kitchen Equipment Essentials
Now, let’s tackle the kitchen equipment . To make this quick and easy garlic bread recipe , you’ll need:
- Air fryer (obviously, right?). If you don’t have one, the oven works, but it won’t be quite as crispy.
- Mixing bowl for combining that glorious garlic butter.
- Butter knife or pastry brush for spreading the butter perfectly.
Don’t worry if one of these tools is missing; you can improvise! Use a regular knife for spreading or even a spoon.
Time to Get Cooking!
Alright, now that we’ve covered the nitty-gritty of ingredients and tools, you’re officially ready to make the best air fryer garlic bread with cheesy goodness on the block! in no time, you’ll have crispy garlic bread drizzled in melted cheese, ready to be devoured.
So, let’s jump into making this simple yet indulgent dish. ready to impress your friends or just treat yourself? let’s get going!
Mastering Professional Cooking Method: Your Guide to Deliciousness
So, you wanna step up your cooking game? we’re diving into some essential steps to get you rolling like a pro in the kitchen.
Whether you’re a newbie or just looking to zhuzh up your skills, a solid foundation makes all the difference. let’s talk about everything from prep to cooking techniques that will elevate all your homemade delights, like that crave-worthy air fryer garlic bread with cheesy goodness .
Essential Preparation Steps
First up, let’s get to mise en place . french for “everything in its place,” this means prepping all your ingredients before you start cooking.
Chop, measure, and have everything ready - it’ll save you time and make things less chaotic. have you ever realized you forgot an ingredient halfway through cooking? yeah, not fun!
Then, let’s chat about time management . some folks can be a bit too leisurely while cooking, but it pays to keep it snappy.
For example, chop your garlic while your butter softens. multitasking at its finest! similarly, organization strategies are key. keep your workspace neat, and don’t be afraid to use bowls to separate ingredients.
It keeps things clear and keeps you sane.
And let’s not forget safety considerations . sharp knives, hot surfaces, and hot oil are all in play. always use oven mitts! seriously, i've burned my hands way too many times trying to play tough.
That’s a lesson learned the hard way.
Step-by-Step Process for Cooking
Let's break this down into clear steps.
-
Prep your ingredients : get your garlic butter ready by mixing your softened butter, minced garlic, italian seasoning, salt, and pepper in a bowl.
Aim for that rich garlic aroma, it should hit you before you even start cooking!
-
Preheat the Air Fryer : Set it to 350° F ( 175° C) while you prepare your bread. It’s like warming up the grill before a barbecue—essential for great results.
-
Apply the Garlic Butter : Spread that garlic butter treasure over your sliced bread. Make it look good—you're gonna want to eat it!
-
Add Cheese Like You Mean It! Sprinkle the mozzarella and Parmesan cheese on top. Go generous because who doesn’t love cheese?
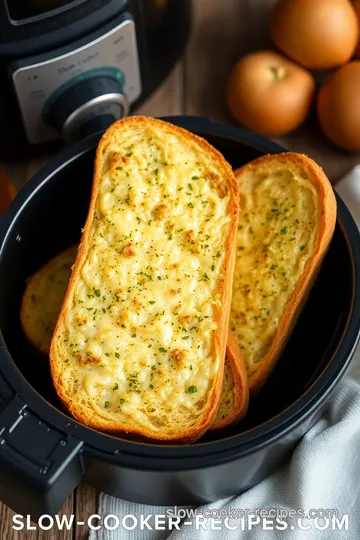
-
Air fry magic : place your bread in the air fryer, cut side up, and set the timer for 8- 10 minutes .
Keep an eye out until that cheese gets bubbly and golden. this is where the magic happens—sprinkle freshness with parsley before serving for that restaurant-like vibe.
Expert Techniques
Now for some pro tips that can make or break your dish.
-
Temperature control is essential. That’s why preheating is non-negotiable! Cold air fryers can mess with cooking times.
-
Timing precision is your best friend. Don’t wander off while the garlic bread is cooking. Trust me on this one; burnt cheese is a sad sight.
-
Use visual cues for doneness. If it’s bubbling, you’re nearly there!
Success Strategies for Perfect Results
Every cook has their oops moments, and that’s okay! common mistakes to avoid include overcrowding the air fryer. if your bread is too crowded, it won’t crisp up.
Also, don’t skimp on your ingredients. good butter and fresh garlic make homemade garlic bread pop, trust me.
For quality assurance tips, taste as you go. just a tiny bit of that garlic butter mix can tell you if it needs more salt—don't skip it! lastly, if you want to serve a crowd, prepping make-ahead options can save the day.
Wrapping it Up for Delicious Air Fryer Garlic Bread
There you have it! with these strategies in your back pocket, you’re on your way to creating not just air fryer garlic bread with cheesy goodness , but knocking out other italian bread recipes and more like a pro.
Feeling inspired? keep that excitement rolling into the kitchen, where every meal is an adventure waiting to happen. just remember to have fun along the way! and now that you know the ropes, get ready for some additional information on air frying tips and tricks to keep your kitchen moving smoothly.
Let's get cooking!
Pro Tips & Secrets for Your Garlic Bread Adventure
Honestly, nothing screams comfort like a slice of air fryer garlic bread with cheesy goodness . it’s that blend of buttery, garlicky delight topped with ooey-gooey cheese that can take your basic garlic bread to another level.
So, here are some of my favorite pro tips to nail this garlic goodness!
First off, softened butter is key, my friends. if it's cold, you’ll just be pulling at the bread, trying to spread that garlic butter like a madman.
Pop your stick of unsalted butter in the microwave for about 10-15 seconds to make it spreadable. trust me; it’ll change your garlic bread game.
Also, when you’re mixing the garlic, splash in a bit of italian seasoning for that authentic italian vibe.
Now, here’s a little time-saver: preheat your air fryer while you’re prepping! it only takes a few minutes, and you save precious time when you're hungry.
And let’s be real, who isn’t hungry after a long day?
Want those flavors to sing in your mouth? try adding a sprinkle of crushed red pepper if you like a little spice! it adds a zing that can really elevate your garlic bread experience.
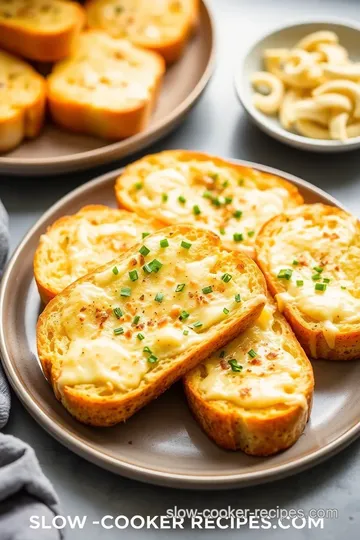
Perfect Presentation Like a Pro
When it comes to presentation , we all want our food to look as good as it tastes, right? for my air fryer garlic bread with cheesy goodness , plating can make a big difference.
Use a nice serving board or platter. when you take those cheesy, bubbly slices out, arrange them so they overlap slightly—this adds a touch of flair.
Garnishing with a little chopped fresh parsley is not just for looks; it adds a pop of color and freshness.
Just a light sprinkle over that golden, crispy garlic bread can make all the difference. i mean, who doesn’t love a good visual feast to instagram?
Storage and Make-Ahead Strategies
Let’s talk about storage and how to whip this up ahead of time. if you have leftovers (you might not—this stuff is that good), simply wrap your leftovers in foil or place them in an airtight container.
You can keep them in the fridge for about 3-4 days . if you want to go the extra mile, you can even make the garlic butter ahead of time and store it in the fridge—just remember to soften it before you spread it on the bread!
Reheating? Pop those slices back in the air fryer at 350° F for about 3- 5 minutes . This will give you that crispy exterior again, and honestly, it'll taste like you just made it fresh!
Creative Variations to Spice Things Up
One of the best parts about this garlic bread recipe is how versatile it is. feeling adventurous? mozzarella garlic bread is great, but you could also swap that mozzarella for some cheddar or even feta cheese for a unique twist.
If you're hosting a gathering, try herb-infused garlic bread with toppings like basil or thyme straight from your garden. want to keep it light? a vegan garlic bread recipe is simple too—just switch to plant-based butter and dairy-free cheese options.
And if you’re feeling the autumn spirit, throw some pumpkin spice into that garlic butter for a seasonal kick. Can you imagine that? Yes, please!
Complete Nutrition Guide
Now, let’s break down the nutrition for our cheesy garlic bread . each serving (that’s two slices) comes in around 320 calories , with some solid fats from that butter and cheese.
Remember, moderation is key! and if you're mindful of your health goals, using whole grain or gluten-free bread can balance things out.
Garlic has those lovely cooked garlic health benefits , like boosting your immunity, so hey, we’re winning here!
Wrap It All Up
So, there you have it! with these tips, you’ll be ready to whip up some of the best air fryer garlic bread with cheesy goodness you’ve ever tasted! it’ll be a hit whether you want a side for pasta or a quick snack idea.
So grab that loaf, mix up that garlic butter spread , and indulge in the magic of cheesy garlic bread! You won’t regret it. Happy cooking, friends!
Frequently Asked Questions
What is Air Fryer Garlic Bread with Cheesy Goodness?
Air Fryer Garlic Bread with Cheesy Goodness is a delicious twist on classic garlic bread that features a buttery, garlic-infused spread topped with melty mozzarella and Parmesan cheese, all cooked to perfection in an air fryer. It’s a quick and easy recipe ideal as a snack or side dish.
Can I use different types of bread for this recipe?
Absolutely! While French or Italian bread is recommended for its texture and flavor, you can also experiment with sourdough, ciabatta, or even gluten-free options. Just make sure the bread can hold up to the toppings and cook evenly in the air fryer.
How do I store leftovers of Air Fryer Garlic Bread with Cheesy Goodness?
Leftover garlic bread can be stored in an airtight container in the refrigerator for up to 3 days. For best results, reheat it in the air fryer for a few minutes to restore the crispy texture before serving.
Can I make Air Fryer Garlic Bread with Cheesy Goodness ahead of time?
Yes, you can prepare the bread with the garlic butter and cheese toppings ahead of time and store it in the refrigerator for a few hours. Just air fry it right before serving for the best flavor and texture. If you prepare it in advance, it may take an extra minute or two to cook through.
What are some variations I can try with this recipe?
You can customize your Air Fryer Garlic Bread with Cheesy Goodness in many ways: add fresh herbs like basil, mix in red pepper flakes for a spicy kick, or even switch up the cheeses by using cheddar or gouda. For a vegan option, use plant-based butter and dairy-free cheese alternatives.
How do I ensure the cheese melts perfectly without burning?
To avoid burning the cheese, keep an eye on the bread as it cooks. Preheating the air fryer is essential, and you may need to adjust the cook time depending on your specific model. If you notice the cheese melting but the bread isn't golden yet, you can briefly lower the temperature to allow for even cooking.
Air Fryer Garlic Bread with Cheesy Goodness Card

⚖️ Ingredients:
- 1/2 cup (115g) unsalted butter, softened
- 4 cloves garlic, minced
- 1 teaspoon Italian seasoning
- 1/4 teaspoon salt
- 1/4 teaspoon black pepper
- 1 medium loaf of French or Italian bread (about 12-16 inches)
- 1 cup (100g) shredded mozzarella cheese
- 1/2 cup (50g) grated Parmesan cheese
- Fresh parsley, chopped (for garnish, optional)
🥄 Instructions:
- Step 1: In a mixing bowl, combine softened butter, minced garlic, Italian seasoning, salt, and black pepper. Mix until well combined.
- Step 2: Slice the loaf of bread in half lengthwise. Use a butter knife to spread the garlic butter mixture evenly over each half.
- Step 3: Sprinkle shredded mozzarella and grated Parmesan cheese evenly over the buttered sides of the bread.
- Step 4: Preheat the air fryer to 350°F (175°C). Place the prepared bread halves in the air fryer basket, cut side up. Cook for 8-10 minutes until cheese is bubbly and golden.
- Step 5: Remove from the air fryer. Optionally garnish with chopped parsley before slicing and serving.
Previous Recipe: Rustic Cowboy Cookies: Bake for a Hearty Treat!
Next Recipe: My Savory Blackened Chicken Alfredo with Creamy Sauce: A Family Favorite